
Table of Contents
- Why Exhaust Maintenance Matters for Performance and Longevity
- How to Clean Motorcycle Exhaust Pipes Safely
- Motorcycle Exhaust Rust Removal Without Damaging the Finish
- Motorcycle Exhaust Leak Symptoms You Should Never Ignore
- Motorcycle Exhaust Maintenance Schedule: What to Do and When
- Preventing Discoloration and Protecting Your Exhaust Long-Term
- Frequently Asked Questions
Last Updated: October 7, 2026
Why Exhaust Maintenance Matters for Performance and Longevity
Your exhaust system does more than move gas away from the engine. It manages heat, controls sound, and affects how your bike breathes.
Motorcycle exhaust system maintenance tips start with one simple rule: clean it before it corrodes. Chrome, stainless steel, and titanium all react differently to heat and road grime.
The payoff is real. A clean, sealed exhaust protects engine performance and keeps your bike looking sharp.
How to Clean Motorcycle Exhaust Pipes Safely
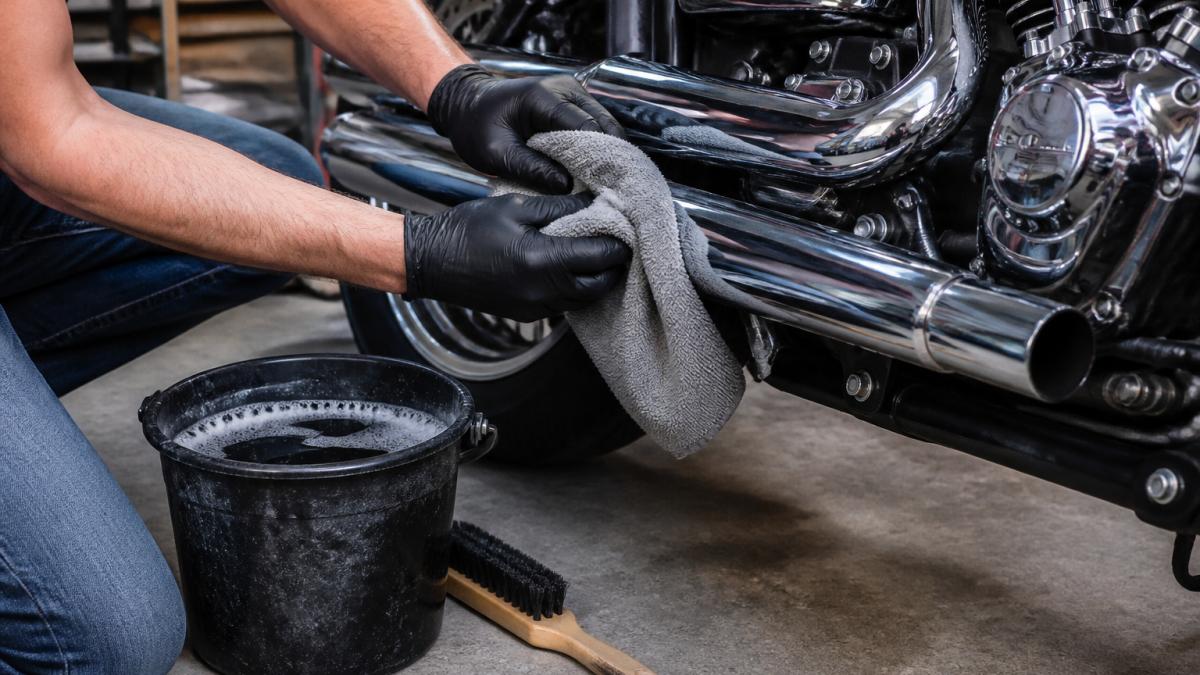
The safest way to clean motorcycle exhaust pipes is to let them cool completely first. Heat plus cold water equals warped metal and cracked chrome. Wait at least 30 minutes after a ride.
Once cool, follow this routine:
- Rinse the pipes with plain water to lift loose dirt
- Spray a pH-neutral cleaner on a cool surface
- Wipe with a microfiber cloth, not a shop rag
- Use a soft brush for tight spots near the headers
- Rinse again and dry with a clean cloth
Never use steel wool or abrasive pads. They scratch the finish and leave swirl marks that trap grime.
Step-by-Step Cleaning Process
Start with a cool exhaust and work in the shade. Direct sun dries cleaner too fast and leaves streaks.
- Rinse first: Remove loose dirt and dust with a gentle stream
- Apply cleaner: Use a spray bottle, not a soaked rag
- Wipe in one direction: Back-and-forth rubbing creates scratches
- Rinse and dry: A dry cloth prevents water spots
For stubborn road grime, let the cleaner sit for a minute. Don't scrub harder. Let the product do the work.
Material-Specific Care: Chrome, Stainless Steel, and Titanium
Chrome is the most delicate. It needs a non-abrasive polish and a soft cloth. Skip anything labeled "heavy duty."
Stainless steel handles more abuse. You can use a mild metal polish and a bit more pressure. It resists rust better than chrome but still stains.
Titanium is the easiest to scratch and the hardest to restore. Use only a dedicated titanium cleaner and a microfiber cloth.
Motorcycle Exhaust Rust Removal Without Damaging the Finish
Rust on an exhaust is a chemical process, not just a cosmetic problem. Bare steel and chrome-plated steel react with oxygen and moisture to form iron oxide, and road salt accelerates the reaction by keeping the surface wet and conductive.
Work from least aggressive to most aggressive, and stop as soon as the rust is gone. Every step removes a little base metal along with the oxide.
Method-by-Method, With Trade-Offs
- Bronze wool plus metal polish: The safest starting point for chrome and stainless. Bronze is softer than steel wool and will not shed ferrous particles that seed new rust. Use light pressure and keep the surface wet with polish.
- Fine abrasive pad (1000 grit or finer): Only for stubborn spots on stainless or unpainted steel. Never on chrome, you will cut through the plating and expose the steel underneath, which rusts faster than the original surface.
- Chemical rust remover (phosphoric-acid based): Effective on pitted areas. Follow the label, work outdoors or with strong ventilation, wear nitrile gloves and eye protection, and keep it off painted, anodized, and plastic surfaces. Do not let it dry on the metal.
- Rust converter: Converts remaining oxide into a stable black phosphate layer. It is a primer, not a finish, top it with a high-temperature coating or it will chalk and flake.
Finish-Specific Rules
- Chrome: Bronze wool and a chrome-safe polish only. No acids, no abrasives coarser than 1000 grit, no wire brushes. Once chrome pits through to the base steel, the only real fix is re-plating or replacement.
- Stainless steel: More forgiving. You can use a stainless-specific polish and a non-metallic pad. Avoid steel wool, embedded carbon steel particles cause "rust bloom" spots that look like the stainless itself is corroding.
- Titanium: Do not use abrasive pads or acids. Titanium develops a natural oxide layer that gives it color; aggressive cleaning strips it and leaves a dull, uneven surface that is expensive to restore.
- Painted or ceramic-coated: No abrasives at all. Use a pH-neutral cleaner and a soft cloth. Chipped coating should be touched up with a matching high-temperature paint before rust starts underneath.
After the Rust Is Gone
- Wash the area with plain water and dry it completely.
- Apply a high-temperature wax or sealant designed for exhaust surfaces. Standard car wax burns off headers within a few heat cycles.
- Re-check the same spot after two weeks. If rust is already returning, the cause is usually a leak, a failed gasket, or trapped moisture, not the cleaning method.
If rust keeps returning in the same place, treat it as a mechanical symptom, not a cleaning problem. Moisture pooling near a bad gasket or a cracked weld will keep corroding the metal no matter how well you polish it.
EXHAUST GASKETS TAPERED GRAPHITE 1984-2025 HARLEY DAVIDSON MODELS →
Motorcycle Exhaust Leak Symptoms You Should Never Ignore
An exhaust leak is a safety issue before it is a performance issue. Carbon monoxide from a leak near the cabin or under a rider's leg can reach dangerous concentrations, and hot gas escaping at the cylinder head can cook wiring, plastic, and paint within minutes of riding.
Symptoms, and What Each One Usually Means
- Ticking or popping that rises with RPM: Almost always a leak at the head-to-header joint or a failed gasket. The tick is the sound of combustion pressure escaping past a bad seal.
- Sudden increase in exhaust volume: A crack, a blown gasket, or a joint that has worked loose. Compare the sound cold versus hot, cracks often open up as the metal expands.
- Black soot streaks around a joint or flange: The clearest visual evidence of a leak. Soot is unburned carbon depositing where hot gas is escaping.
- Drop in fuel economy or a rough idle: On fuel-injected bikes, an upstream leak lets air into the exhaust stream and skews the O2 sensor reading, so the ECU richens the mixture.
- Check engine light (P0130-series or similar lean/rich codes): Often the first sign on modern bikes. Do not clear the code without inspecting the exhaust first.
Mechanical Inspection Checklist
Do this with the bike cold, on a lift or center stand, in good light.

- Fasteners: Check every exhaust flange nut, header bolt, and muffler clamp. Look for missing nuts, stretched threads, and crush washers that have flattened. Re-torque to the manufacturer's spec, overtightening warps flanges and causes the next leak.
- Gaskets: Inspect the head-to-header gasket, collector gaskets, and muffler joint gaskets. Graphite and copper crush gaskets are single-use; once compressed they do not reseal. Replace rather than reuse.
- Joints and welds: Run a gloved hand along the pipe (cold) and look for hairline cracks, especially at hanger brackets and weld seams. Cracks usually start at stress points.
- Mounts and hangers: Worn rubber isolators let the system vibrate, which cracks pipes and loosens fasteners. Replace cracked or hardened isolators.
- Corrosion: Thin, flaking metal near a low point or a hanger is a leak waiting to happen. Pitting that has gone through the wall cannot be polished out.
- Clearance: Confirm the pipe is not touching the swingarm, bodywork, or wiring. Heat damage to a wiring loom is expensive and sometimes dangerous.
Catalytic Converter and O2 Sensor Cautions
Modern systems have components that punish careless maintenance.
- Do not flush or pressure-wash the inside of a catalytic converter. The honeycomb substrate is fragile and contaminated wash water can destroy it. If the converter is clogged, the correct fix is diagnosis and replacement, not cleaning.
- Do not run the engine with the O2 sensor removed to "check" for a leak. On most fuel-injected bikes this triggers a fault, dumps fuel, and can overheat the converter.
- Use the correct sensor-safe sealant. Silicone sealants that are not O2-sensor safe release compounds that coat the sensor and cause false readings.
- If you delete or replace a converter, check your local emissions requirements before riding on public roads. Tampering with emissions equipment can affect roadworthiness and insurance.
If you find soot, a ticking sound, or a code together, treat it as a confirmed leak and stop riding until it is repaired. Exhaust gas does not stay where you expect it to.
Motorcycle Exhaust Maintenance Schedule: What to Do and When
A motorcycle exhaust maintenance schedule keeps small issues from becoming expensive ones. Here's what we recommend based on typical riding:
| Task | Frequency | Why It Matters |
|---|---|---|
| Rinse and wipe down | After every ride in wet or salty conditions | Prevents grime buildup |
| Full clean and polish | Every 2-4 weeks | Protects finish, spots rust early |
| Inspect gaskets and mounts | Every 3 months | Catches leaks before damage |
| Deep rust check | Before and after winter storage | Prevents corrosion spread |
| Replace worn gaskets | As needed, or every 2-3 seasons | Keeps the seal tight |
Riders in areas with road salt should clean more often. Salt speeds corrosion faster than anything else.
Preventing Discoloration and Protecting Your Exhaust Long-Term
Discoloration comes from heat, oil, and contaminants baking onto the surface. The fix is prevention, not scrubbing.
- Wipe off oil and fingerprints before they bake on
- Use a heat-resistant sealant on headers
- Avoid letting melted clothing or boot rubber sit on hot pipes
- Store your bike dry and covered in winter
If discoloration appears, a metal polish made for your pipe material can lift light blue or gold tint. Deep discoloration usually means the metal overheated.
For long-term protection, we recommend a quality metal polish and a microfiber cloth as your two core tools.
Frequently Asked Questions
How often should I clean and inspect my motorcycle exhaust?
Clean your exhaust every 800 to 1,000 kilometers or after riding in rain or on salted roads. Inspect for rust, leaks, and loose fittings at every oil change. If you ride in winter conditions, check weekly for salt buildup. A consistent motorcycle exhaust maintenance schedule prevents corrosion and catches small issues before they become expensive repairs.
What are the signs of a motorcycle exhaust leak?
Common motorcycle exhaust leak symptoms include increased exhaust noise, a ticking or popping sound, reduced fuel economy, and a sulfur or gasoline smell while riding. You may also notice discoloration around joints or soot streaks on the pipe. If you spot any of these, check gaskets and connections. Worn gaskets are a frequent cause and are inexpensive to replace.
Can I use household cleaners on my motorcycle exhaust?
Avoid abrasive household cleaners, oven degreasers, and steel wool on chrome or polished finishes. These can scratch the surface and strip protective coatings. Use a pH-neutral motorcycle cleaner or mild dish soap with warm water and a microfiber cloth. For stubborn burnt-on residue, apply a dedicated metal polish made for your exhaust material. Always clean when the exhaust is cool to prevent burns and streaking.
How do I remove rust from motorcycle exhaust pipes?
For light surface rust, use fine bronze wool or a non-abrasive rust remover with a microfiber cloth. For heavier rust, apply a metal polish designed for chrome or stainless steel and buff with a soft pad. If rust has penetrated deeply or caused pitting, replacement may be necessary. After removal, apply a protective wax or sealant to slow future corrosion, especially before winter storage.
Your exhaust takes a beating from heat, weather, and road grime. A simple cleaning and inspection routine keeps it performing and looking its best. When you need replacement gaskets, sensor plugs, or a fresh set of pipes, THE SPEED SHOP CANADA has you covered with free shipping on orders over $200 and flexible financing through Shop Pay, RBC PayPlan, and Sezzle. Get started with THE SPEED SHOP CANADA and keep your ride running strong.