
Table of Contents
- Why Aftermarket Parts Fitment Goes Wrong (and How to Prevent It)
- Harley-Davidson Parts Fitment by Year and Model: The Compatibility Matrix
- Harley-Davidson VIN Parts Lookup: Decoding Your Bike's Exact Build
- Harley-Davidson OEM Part Number Lookup: Cross-Referencing Before You Buy
- Aftermarket Harley Parts Installation: Tools, Clearance, and System Checks
- Your Step-by-Step Fitment Verification Workflow
- Returns, Warranties, and Buyer Protections for Aftermarket Parts
- Frequently Asked Questions
Last Updated: October 5, 2026
Why Aftermarket Parts Fitment Goes Wrong (and How to Prevent It)
The biggest reason aftermarket parts fit goes wrong is that buyers match parts to a model name instead of to their bike's exact build. "Fits a 2005 Dyna" is not a specification.
At THE SPEED SHOP CANADA, we see the same pattern every week: a rider orders an exhaust, a fairing, or a suspension kit, then discovers it won't clear the frame or plug into the factory harness.

Fitment is the process of confirming a part will physically bolt on, clear everything around it, and work with your bike's existing systems. That means four checks:
- The correct model family and year range
- The exact build date and running changes
- The part number cross-reference
- Clearance and electrical compatibility
Below, we walk through each check in order, so you can order once and install once.
Harley-Davidson Parts Fitment by Year and Model: The Compatibility Matrix
Harley-Davidson parts fitment by year and model starts with the model family, not the year. Harley builds bikes in families that share frames, mounts, and wiring layouts. Get the family right and most of the fitment question answers itself. Get it wrong and no amount of part-number checking will save the order.
Model Families: Dyna, Softail, Sportster, Touring, and V-Rod
Each family has its own frame geometry, engine mounting, and mounting points. A part built for a Softail rarely bolts to a Dyna, even when both bikes look similar from ten feet away.
- Dyna: Rubber-mounted engines, twin rear shocks, exposed frame. Produced through 2017. Dyna frames changed across the run, so a part listed for "Dyna" may still need a year and build-date check.
- Softail: Hidden rear suspension under the transmission, a completely different frame from Dyna. The Softail frame was redesigned in 2018, which split the family into pre-2018 and 2018-and-later fitment groups for many parts.
- Sportster: Smaller frame, its own mounts and dimensions. The Evolution engine family ran for decades with incremental changes, so "Sportster" alone is not a fitment answer.
- Touring: Fairings, saddlebags, and a heavier chassis with touring-specific wiring. Touring frames changed in 2009 and again with the 2014 Project Rushmore update, which moved bodywork, cooling, and electrical layouts.
The practical takeaway: always confirm the family first, then the year range inside that family, then the build date inside that year.
Why Family Beats Year as a Starting Point
A year tells you when a bike was built. A family tells you what it was built on. Two bikes from the same model year can sit in different families with different frames, and two bikes from different years can share a family and most of their mounting points. That is why a part listing that says "fits 2005 Dyna" is a starting point, not a specification.
When you shop, work in this order:
- Identify the family.
- Identify the year range within that family.
- Identify the build window within that year.
- Only then compare part numbers.
Mid-Year Production Changes and Running Updates
Model year alone can mislead you. Manufacturers make running changes mid-year, and a part that fits an early build may not fit a later one from the same year.
Running changes are not random. They tend to land in a few predictable places:
- Mounting points and brackets move when a frame or engine mount is revised.
- Wiring harnesses and connector styles change when a new electrical accessory is added to the line.
- Exhaust and intake routing shifts when emissions or cooling hardware is updated.
- Bodywork and fender spacing changes when wheel or tire sizes are revised.
Harley-Davidson VIN Parts Lookup: Decoding Your Bike's Exact Build
A Harley-Davidson VIN parts lookup gives you the exact build details for your bike, not just its model name. The VIN is the single most reliable way to confirm what you actually own.
Here's how to use it:
- Find the VIN on the frame neck or the engine case.
- Decode the model, engine, and year codes from the VIN.
- Match those codes against the part's listed fitment range.
- Note the production date if the seller lists mid-year changes.
For build-specific details, Harley-Davidson's official owner and VIN resources can help confirm your model configuration.
Harley-Davidson OEM Part Number Lookup: Cross-Referencing Before You Buy
A Harley-Davidson OEM part number lookup tells you what the factory part actually is, which lets you cross-reference any aftermarket replacement against it. This is the step most buyers skip, and it's the one that saves the most returns.
The workflow is simple:
- Find the OEM number for the part you're replacing.
- Check whether the aftermarket part lists that OEM number as a cross-reference.
- Confirm the aftermarket part's own number matches the seller's listing.
- If the numbers don't line up, stop and ask before you order.
A genuine OEM number and an aftermarket cross-reference should point to the same physical part. When they don't, one of the two listings is wrong.
LEGEND AXEO FORK KITS 39MM HARLEY DYNAFXR//XL (+2) →
Aftermarket Harley Parts Installation: Tools, Clearance, and System Checks
Aftermarket Harley parts installation succeeds or fails on three things: the right tools, enough clearance, and system compatibility. A part can fit the bolt holes perfectly and still fail on any of these.
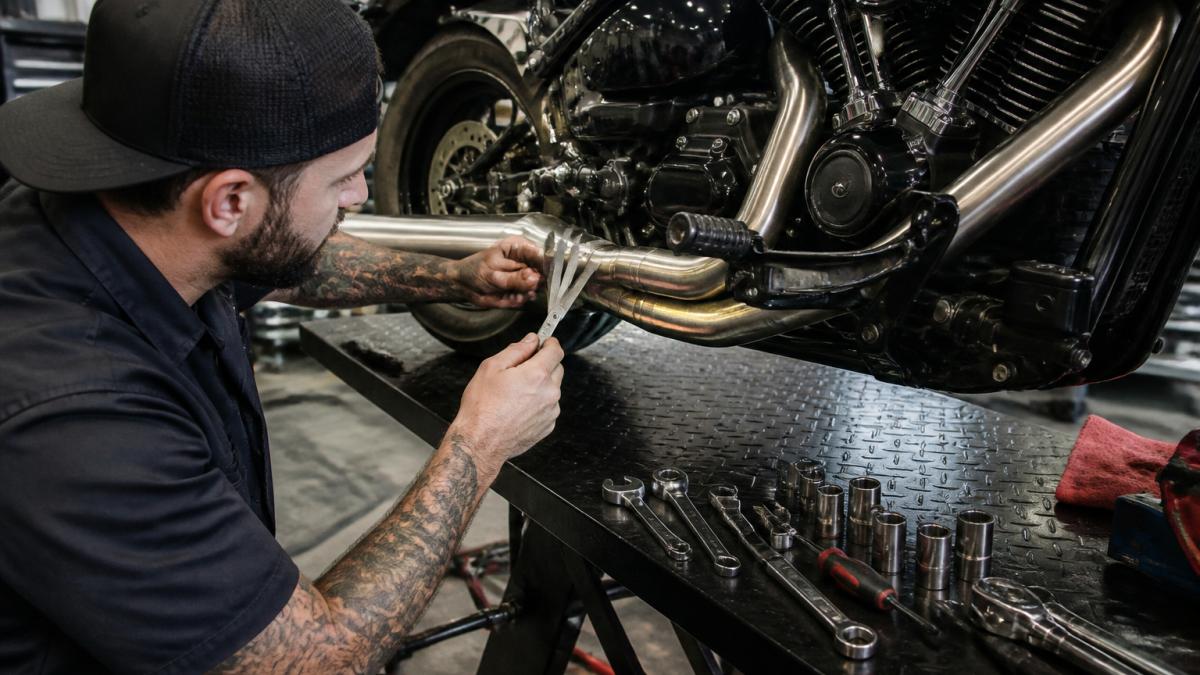
Basic tools to have ready:
- Torque wrench matched to your bike's spec
- Feeler gauge for clearance checks
- Factory service manual for your model
- Anti-seize and thread locker
Electrical and Connector Compatibility
Electrical and connector compatibility is where fitment gets technical. A part can bolt on and still not work if the plugs don't match, or if it works briefly and then overheats a circuit.
Check these before you order:
- Connector type and pin count. Harley has used several connector families across model years. A two-pin and a three-pin connector can look similar in a photo but will not mate.
- Voltage and current draw. A lighting or accessory part that draws more current than the factory circuit allows will need a relay or an adapter harness, not just a plug-and-play swap.
- Whether the part needs a relay or adapter harness. Many aftermarket lighting and audio parts ship with an optional harness for exactly this reason.
- Whether it changes the factory wiring. Cutting into a factory harness can affect other circuits and can complicate warranty coverage.
A common pattern is a rider installing an aftermarket light that works on the bench, then finding it flickers or throws a fault once the bike is running.
Clearance and System-Level Compatibility
Clearance and system-level compatibility means checking that the new part doesn't hit anything around it, and that nothing around it hits the new part. Suspension travel, exhaust routing, and steering angle all change when you add parts.
Watch for these conflicts:
- Exhaust pipes hitting the frame or swingarm under load. A pipe that clears at rest can contact the swingarm when the suspension compresses.
- Fairings interfering with handlebars at full lock. Check steering lock-to-lock, not just center.
- Wider wheels rubbing fenders or belts. Belt guards and fender struts are common contact points.
- Lowered suspension reducing ground clearance. Lowering changes the geometry that other parts were designed around.
- Saddlebags and luggage contacting the rear tire or exhaust when loaded.
Installation Difficulty: What You Can Do and What You Shouldn't
Not every aftermarket part is a driveway job. Before you buy, sort the part into one of three buckets:
- Straightforward swaps. Mirrors, grips, seats, and most cosmetic accessories usually need basic hand tools and no torque-critical fasteners.
- Torque-critical and safety-critical jobs. Brakes, suspension, wheels, and steering components require a torque wrench, correct torque specifications, and often a service manual. Getting these wrong is a safety issue, not just a fitment issue.
- Jobs needing specialist tools or professional installation. Some exhaust, fuel, and electrical jobs need specific tools, fuel-system handling, or diagnostic equipment.
If you are not sure which bucket a part falls into, ask the seller before you order.
Your Step-by-Step Fitment Verification Workflow
Use this checklist every time you order aftermarket parts. It takes ten minutes and prevents most returns.
- Confirm the model family (Dyna, Softail, Sportster, Touring, V-Rod)
- Decode the VIN and confirm the exact year and build
- Check for mid-year production changes in your model year
- Find the OEM part number for the part you're replacing
- Cross-reference the aftermarket part against that OEM number
| Check | Why It Matters | What to Confirm |
|---|---|---|
| Model family | Frames and mounts differ | Dyna, Softail, Sportster, Touring, V-Rod |
| VIN and build date | Mid-year changes exist | Exact year and production window |
| OEM cross-reference | Prevents wrong-part orders | Part numbers match |
| Electrical | Plugs and draw must match | Connector type, voltage, relay needs |
| Clearance | Moving parts can collide | Suspension travel, steering lock |
| Return policy | Protects your money | Fitment guarantee and warranty |
Returns, Warranties, and Buyer Protections for Aftermarket Parts
Returns, warranties, and buyer protections matter as much as the part itself. A seller with a clear fitment guarantee is worth more than a slightly lower price.
Ask these questions before you order:
- Does the seller offer a fitment guarantee?
- What's the return window, and who pays return shipping?
- Is the warranty from the manufacturer or the reseller?
- Are special-order or electrical parts returnable?
We stock parts from brands we trust, including a Drag / Parts Canada dealer relationship, and we back that with clear return terms.
Fitment mistakes cost time, shipping, and sometimes a ruined weekend.
Frequently Asked Questions
How do I check whether aftermarket parts fit my Harley-Davidson?
Start by decoding your VIN to confirm the exact model year, model family, and production run. Next, find the OEM part number for the component you're replacing and cross-reference it against the aftermarket manufacturer's fitment guide. Measure critical dimensions like mounting bolt spacing, fork tube diameter, and clearance around the part before ordering. If the aftermarket listing covers multiple model years, verify that your specific year and trim are included. When in doubt, contact the seller with your VIN and ask them to confirm fitment in writing.
Can aftermarket parts fit multiple Harley-Davidson model years?
Yes, many aftermarket parts are designed to fit a range of model years within the same model family. For example, a fork kit listed for 1991-2005 Dyna models covers multiple years because the frame and suspension geometry stayed consistent across that span. However, mid-year production changes, trim-level differences, and running updates can break compatibility even within a listed range. Always check the manufacturer's exclusions and notes section. If your bike falls at the edge of a year range or has a special trim, verify fitment with the seller before ordering.
What should I do if an aftermarket part does not fit my Harley-Davidson?
Stop the installation immediately and do not modify the part or the bike, as this can void your return eligibility. Photograph the mismatch, including any part numbers and the area where fitment fails. Contact the seller with your order number, VIN, and photos. Reputable sellers offer return or exchange options for fitment issues. If you purchased from a Canadian dealer, confirm their return window and whether they cover return shipping. Keep all original packaging and hardware until the issue is resolved.
Should I compare an aftermarket part number with the OEM part number?
Yes, cross-referencing the aftermarket part number against the OEM part number is one of the most reliable ways to confirm fitment. Aftermarket manufacturers typically publish a cross-reference chart or list the OEM numbers their part replaces. If the aftermarket part claims to replace a specific OEM number, look up that OEM number in a Harley-Davidson parts catalog for your model year and confirm it matches your bike. If the numbers do not cross-reference cleanly, treat the part as unverified and ask the seller for confirmation.